
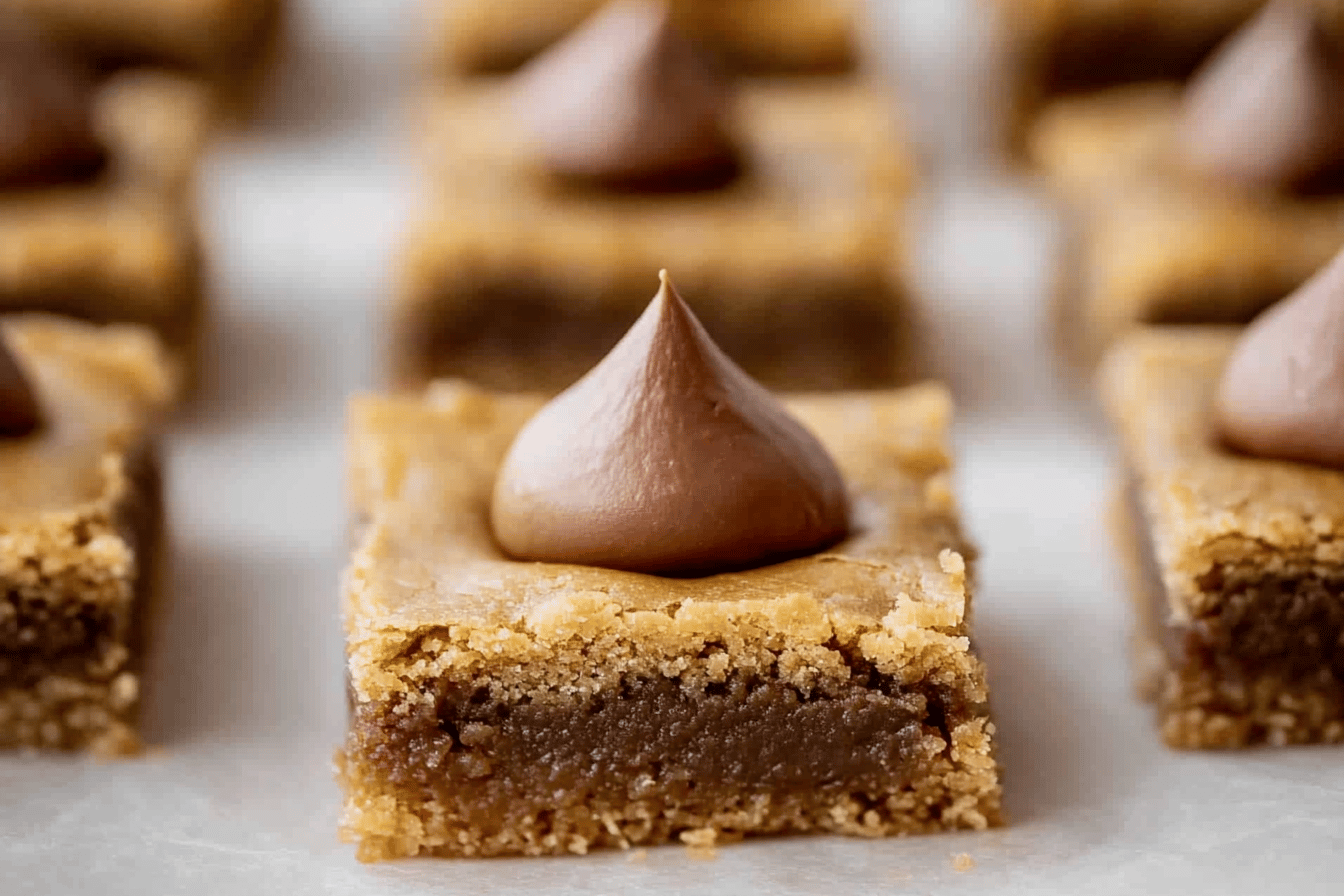
Peanut Butter Blossom Bars are a delightful treat that combines the rich flavors of peanut butter and chocolate in a bar format that is both easy to make and irresistibly delicious. These bars are perfect for satisfying your sweet tooth while offering a nostalgic nod to the classic Peanut Butter Blossoms cookies that many of us grew up enjoying. The warm, gooey center topped with a delightful Hershey’s Kiss makes them not only appealing to the eye but also a favorite at gatherings, holidays, or simply as a sweet afternoon snack. Whether you’re celebrating a special occasion or just indulging in a cozy night at home, these bars are sure to please everyone, making them a staple in any dessert recipe collection.
Tools and Equipment
To create your scrumptious Peanut Butter Blossom Bars, you will need a few essential tools and equipment to ensure your baking process goes smoothly. Gather the following:
- Measuring cups and spoons
- Mixing bowls (large and medium)
- Electric mixer or whisk
- Rubber spatula or wooden spoon
- 9×13-inch baking pan
- Grease or cooking spray
- Oven mitts
- Cooling rack
Having the right tools will not only make the process easier but also help in achieving the best results for your bars.
Ingredients List
Before diving into the preparation, let’s take a closer look at the ingredients that make these Peanut Butter Blossom Bars so special:
- Unsalted Butter: 1/2 cup, softened
- Granulated Sugar: 1/2 cup
- Brown Sugar: 1/2 cup
- Creamy Peanut Butter: 1/2 cup
- Egg: 1
- All-Purpose Flour: 1 1/2 cups
- Baking Soda: 3/4 tsp
- Baking Powder: 1/2 tsp
- Salt: 1/8 tsp
- Milk Chocolate Chips: 2/3 cup
Unsalted Butter is essential for achieving the right texture and flavor without overwhelming saltiness. Granulated Sugar and Brown Sugar create a perfect balance of sweetness and moisture, while the Creamy Peanut Butter provides that rich, nutty flavor that makes these bars irresistible. The Egg acts as a binding agent, helping the bars hold together beautifully.
The All-Purpose Flour serves as the base, giving the bars structure, and the Baking Soda and Baking Powder work together to ensure that the bars rise and become light and fluffy. A pinch of Salt enhances the flavors, and the Milk Chocolate Chips add that extra touch of sweetness and chocolatey goodness.
Preparation Steps
Now that you have your ingredients ready, let’s prepare for the baking process:
- Preheat your oven to 350°F (175°C).
- Grease your 9×13-inch baking pan with cooking spray or butter to prevent sticking.
- Gather all your ingredients on the countertop for easy access.
- Make sure your butter is at room temperature for easier mixing.
- Unwrap the Hershey’s Kisses and set them aside for later.
Tip: It’s important that the butter is softened to room temperature for easy blending and to ensure a smooth dough.
Step-by-Step Cooking Instructions
Follow these detailed steps to create your Peanut Butter Blossom Bars:
- In a large mixing bowl, combine the softened unsalted butter, granulated sugar, brown sugar, creamy peanut butter, and egg. Beat with an electric mixer on medium speed until the mixture is well combined and creamy.
- By hand, stir in the all-purpose flour, baking soda, baking powder, and salt until just combined. The dough will be stiff and almost crumbly, which is normal.
- Fold in the milk chocolate chips until evenly distributed throughout the dough.
- Transfer the dough into the greased baking pan and press it evenly into the bottom.
- Sprinkle 2 teaspoons of white sparkling sugar (or granulated sugar) evenly over the top of the dough.
- Bake in the preheated oven for 22-24 minutes, or until the bars are puffed up and golden brown.
- Remove the bars from the oven and immediately place unwrapped Hershey’s Kisses on top in a 4 rows by 6 rows pattern.
- Sprinkle the remaining teaspoon of white sparkling sugar (or granulated sugar) over the top.
- Allow the bars to cool completely before cutting them into squares, ensuring each piece has a Hershey’s Kiss in the center.
Important: After placing the Hershey’s Kisses on the baked bars, resist the urge to touch them until the bars are completely cooled. The heat will melt them slightly while keeping their shape.
Nutritional Information and Health Benefits
These Peanut Butter Blossom Bars not only satisfy your sweet cravings but also provide some nutritional benefits. Each bar contains a good balance of carbohydrates, fats, and proteins. Peanut butter is a fantastic source of healthy fats and protein, making these bars somewhat more satisfying than your typical dessert. Additionally, the sugars and chocolate provide a quick energy boost, perfect for an afternoon pick-me-up.
While it’s still a treat to be enjoyed in moderation, you can feel a little better knowing that the ingredients include wholesome peanut butter, which is rich in vitamins and minerals like magnesium, vitamin E, and potassium.
Common Mistakes and Tips to Perfect the Recipe
To ensure your Peanut Butter Blossom Bars turn out perfectly every time, here are some common mistakes to avoid and tips to keep in mind:
- Using cold butter: Always make sure your butter is softened to room temperature for the best mixing results.
- Overmixing the dough: Mix until just combined to avoid tough bars.
- Not measuring ingredients accurately: Precision in measuring ingredients is key to achieving the right texture.
- Skipping the cooling step: Allowing the bars to cool completely before cutting ensures clean edges and prevents the Hershey’s Kisses from melting too much.
Pro Tip: For a more intense peanut flavor, consider adding a tablespoon of peanut butter powder to the dough!
Storage, Serving, and Reheating Tips
To keep your Peanut Butter Blossom Bars fresh and delicious, follow these storage and serving suggestions:
- Store the bars in an airtight container at room temperature for up to 5 days.
- For longer storage, you can freeze the bars for up to 3 months. Wrap them tightly in plastic wrap and then in aluminum foil to prevent freezer burn.
- When serving, consider drizzling with melted chocolate or sprinkling with chopped peanuts for added texture and flavor.
Serving Suggestion: Pair your bars with a glass of cold milk or a scoop of vanilla ice cream for an extra indulgent treat!
FAQs and Recipe Variations
Can I use natural peanut butter instead of creamy peanut butter? Yes, but natural peanut butter can alter the texture slightly, so you may need to adjust the amount of flour.
How can I make these bars gluten-free? Substitute all-purpose flour with a gluten-free flour blend and ensure all other ingredients are gluten-free.
What other toppings can I use instead of Hershey’s Kisses? You can use chocolate chunks, caramel candies, or even mini marshmallows for a fun twist!
- Peanut Butter Swirl Variation: Swirl extra peanut butter on top before baking for a marbled effect.
- Oreo Crust Variation: Use crushed Oreo cookies mixed with melted butter as a base for a chocolatey twist.
- Nutty Addition: Add chopped nuts like walnuts or almonds for added crunch and flavor.
Conclusion
In conclusion, Peanut Butter Blossom Bars are a delightful and versatile dessert that brings together the beloved flavors of peanut butter and chocolate in a simple, easy-to-make bar form. They are perfect for any occasion, whether it’s a family gathering, a potluck, or just a cozy night in. With their irresistible taste and texture, these bars are sure to become a favorite among friends and family.
So why wait? Gather your ingredients and start baking today! You’ll be rewarded with a delectable treat that will bring smiles to everyone’s faces!