Indulging our furry friends with a homemade treat not only brings joy to their day but also ensures they’re enjoying something healthy and safe. As the summer heat intensifies, what better way to keep our dogs cool than with a delightful serving of homemade ice cream? This guide will introduce you to an easy and quick recipe for Peanut Butter and Banana Ice Cream, perfect for any dog looking to enjoy a refreshing treat. Not only is this recipe a fun activity for pet owners, but it also provides a nutritious snack for your canine companion, promising a blend of flavors they’re bound to love.
Preparation Phase & Tools to Use
Embarking on the journey of creating homemade dog ice cream is a simple endeavor that requires minimal preparation and a few basic kitchen tools. The beauty of this recipe lies in its straightforwardness, making it accessible to everyone, regardless of their culinary skill level. Here’s what you’ll need to get started:
- A microwave or stove: To gently heat the peanut butter, making it easier to blend with the other ingredients.
- A mixing bowl: For combining the banana, peanut butter, and yogurt into a creamy mixture.
- A fork or potato masher: Ideal for mashing the ripe banana into a smooth consistency.
- A spoon or spatula: To stir the ingredients together, ensuring a well-combined mixture.
- Measuring cups and spoons: For accurately measuring out each ingredient, ensuring the perfect balance of flavors.
- A freezer-safe container: To pour the mixture into and freeze until it reaches the desired consistency.
Gathering these tools before you begin simplifies the process, allowing for a seamless and enjoyable cooking experience.
Ingredients List
In creating this delicious treat, we focus on using ingredients that are not only safe for canine consumption but also beneficial to their health. Here is the list of ingredients you’ll need, including the quantity for each and a brief note on their role in the recipe:
- 1 Ripe Banana: Provides natural sweetness and is rich in potassium.
- 1/2 cup Peanut Butter: Offers healthy fats and proteins, ensuring the ice cream is both tasty and nutritious.
- 1 cup Plain Natural Yogurt: Acts as the base for the ice cream, adding creaminess while being a good source of probiotics.
- 1 teaspoon Honey: Adds a touch of natural sweetness and has antibacterial properties.
Step-by-Step Instructions
Creating this dog-friendly ice cream is as easy as following these simple steps, ensuring a smooth and enjoyable process from start to finish:
- Heat the Peanut Butter: Start by heating the peanut butter in the microwave or on a stove until it’s easy to stir. This makes it more pliable and easier to mix with other ingredients.
- Mash the Banana: Take the ripe banana and mash it in a bowl until it achieves a smooth consistency.
- Combine with Yogurt: Add the plain natural yogurt to the mashed banana, blending them together.
- Sweeten with Honey: Incorporate the teaspoon of honey into the banana and yogurt mixture, stirring well.
- Add Peanut Butter: Finally, stir the softened peanut butter into the mixture until everything is thoroughly combined.
- Freeze: Pour the completed mixture into a freezer-safe container and place it in the freezer.
- Chill: Allow the ice cream to sit in the freezer for at least 6 hours, or until it reaches a firm consistency.
Your dog’s homemade ice cream is now ready to enjoy!
Nutritional Information & Health Benefits
This homemade Peanut Butter and Banana Dog Ice Cream is not only a delightful treat but also packs a nutritional punch. Each ingredient has been carefully selected to ensure it’s safe and beneficial for your dog. Bananas are a great source of vitamins B6 and C, fiber, and potassium, contributing to heart and digestive health. Peanut butter provides a hearty dose of protein and healthy fats, essential for energy and overall well-being. The plain natural yogurt introduces probiotics into your dog’s diet, aiding in digestive health and boosting the immune system. Lastly, a touch of honey adds antioxidants, while its natural sweetness makes the ice cream irresistible to our canine friends.
Common Mistakes to Avoid & How to Perfect the Recipe
When crafting homemade dog ice cream, it’s essential to steer clear of common pitfalls to ensure the treat is both safe and enjoyable for your furry friend. Here are some mistakes to avoid, along with tips on perfecting the recipe:
- Using Ingredients Harmful to Dogs: Always verify that each ingredient is safe for dogs. Avoid using xylitol (a sweetener toxic to dogs) or any ingredient your dog may be allergic to.
- Overfeeding: Even though it’s a healthy treat, moderation is key. Offer your dog small portions to avoid digestive upset.
- Skipping the Freezing Time: The texture of the ice cream is crucial. Ensure it’s fully frozen to provide a real ice cream experience, typically requiring at least 6 hours in the freezer.
To perfect this recipe, consider the following:
- Texture Variations: For a smoother ice cream, blend the mixture before freezing. If your dog prefers a crunch, add small pieces of banana or a drizzle of peanut butter before serving.
- Customization: Feel free to add dog-safe fruits or supplements for additional nutritional benefits. Always consult with a vet before introducing new ingredients to your dog’s diet.
- Consistency: Check the ice cream after 6 hours. If it’s too hard, let it sit at room temperature for a few minutes before serving to soften.
Tips, Notes and Storing
Here are additional tips and considerations for making and storing your DIY dog ice cream:
- Storage Solutions: Store the ice cream in an airtight container in the freezer. For individual servings, consider using an ice cube tray or small containers.
- Longevity: Homemade dog ice cream can last in the freezer for up to 3 months. Ensure it’s well-covered to prevent freezer burn.
- Serving Suggestions: Serve the ice cream as a treat on hot days or as a reward. Remember, this should not replace your dog’s regular meals.
- Health Considerations: Always monitor your dog’s reaction to new treats. If you notice any adverse effects, discontinue use and consult a vet.
FAQs about the DIY Doggy Ice Cream
Q: Can all dogs eat dairy? A: Most dogs can handle the small amounts of dairy in this recipe. However, if your dog is lactose intolerant, substitute the yogurt with a lactose-free alternative.
Q: How often can I give my dog this ice cream? A: Treat your dog to this ice cream in moderation. Once a week is a good guideline, depending on your dog’s diet and health.
Q: Can I use flavored yogurt? A: Stick to plain, natural yogurt without added sugars or artificial sweeteners, as these can be harmful to dogs.
Q: Is it okay to add chocolate? A: No, chocolate is toxic to dogs. Stick to dog-safe ingredients only.
Conclusion
Creating homemade treats like this Peanut Butter and Banana Dog Ice Cream is a wonderful way to show love and care for your furry friend. Not only is it a delightful treat to help them cool down in the summer, but it’s also packed with nutritional benefits. By following the simple steps outlined, avoiding common mistakes, and using the tips provided, you can ensure your dog enjoys a safe, healthy, and delicious treat. Remember, moderation is key, and always keep your dog’s dietary needs and restrictions in mind. Happy treat making!
PrintDIY Doggy Ice Cream
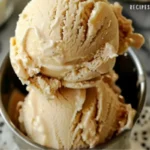
Beat the heat this summer with a special treat for your furry friend! 🐾 Our DIY Dog Ice Cream, made with peanut butter and banana, is the perfect way to keep your pet cool and happy. Quick, healthy, and absolutely delicious! 🍦
- Prep Time: 10 minutes
- Freezing Time: 6 hours
- Total Time: 6 hours 10 minutes
- Yield: 3-4 servings
- Category: Pet Food
- Method: Frezzing
Ingredients
- 1 Ripe Banana: Provides natural sweetness and is rich in potassium.
- 1/2 cup Peanut Butter: Offers healthy fats and proteins, ensuring the ice cream is both tasty and nutritious.
- 1 cup Plain Natural Yogurt: Acts as the base for the ice cream, adding creaminess while being a good source of probiotics.
- 1 teaspoon Honey: Adds a touch of natural sweetness and has antibacterial properties.
Instructions
-
- Heat the Peanut Butter: Start by heating the peanut butter in the microwave or on a stove until it’s easy to stir. This makes it more pliable and easier to mix with other ingredients.
- Mash the Banana: Take the ripe banana and mash it in a bowl until it achieves a smooth consistency.
- Combine with Yogurt: Add the plain natural yogurt to the mashed banana, blending them together.
- Sweeten with Honey: Incorporate the teaspoon of honey into the banana and yogurt mixture, stirring well.
- Add Peanut Butter: Finally, stir the softened peanut butter into the mixture until everything is thoroughly combined.
- Freeze: Pour the completed mixture into a freezer-safe container and place it in the freezer.
- Chill: Allow the ice cream to sit in the freezer for at least 6 hours, or until it reaches a firm consistency.
Your dog’s homemade ice cream is now ready to enjoy!
Notes
- Storage Solutions: Store the ice cream in an airtight container in the freezer. For individual servings, consider using an ice cube tray or small containers.
- Longevity: Homemade dog ice cream can last in the freezer for up to 3 months. Ensure it’s well-covered to prevent freezer burn.
- Serving Suggestions: Serve the ice cream as a treat on hot days or as a reward. Remember, this should not replace your dog’s regular meals.
- Health Considerations: Always monitor your dog’s reaction to new treats. If you notice any adverse effects, discontinue use and consult a vet.