Mini Lemon Tart Meringue: A Zesty Treat for All Occasions
- Prep
- 30 min
- Cook
- 20 min
- Total
- 60 min
- Serves
- 6
- Calories
- 220 kcal
On this page11 quick jumps
TOC
11 quick jumps
Introduction
Introduction to Mini Lemon Tart Meringue
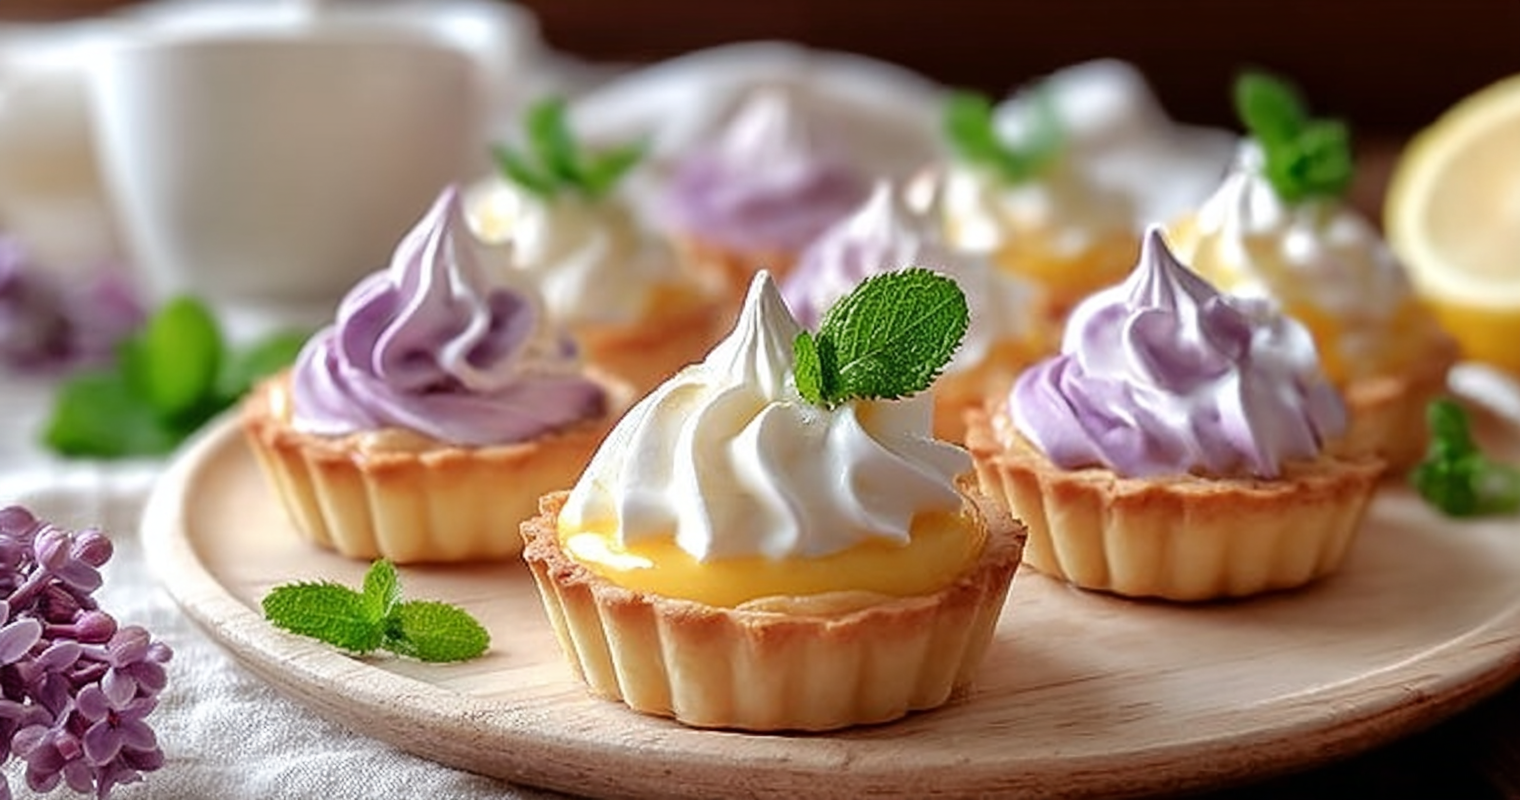
There's something enchanting about lemon tarts that captivates dessert lovers everywhere. This delightful treat offers a perfect balance of tartness and sweetness that excites the palate. The zesty notes of fresh lemons dance harmoniously with a velvety silky filling, while the crisp buttery crust invites countless bites. Among the variations of lemon tarts, the mini lemon tart meringue stands out not only for its exquisite taste but also for its charming presentation. Each little tart is a bite-sized explosion of flavor, making them ideal for gatherings, celebrations, or simply a sweet self-indulgence at home.
Aside from their delicious flavor, what makes these mini tarts so special? The charm of mini pastries can't be overstated. They are perfect for portion control and allow guests to enjoy an assortment of desserts at a party without the guilt of overindulgence. In this article, you'll learn about the key ingredients needed, step-by-step instructions for creating your mini lemon tarts, expert tips for perfecting tart shells, and variations that will inspire your creativity in the kitchen. Let’s get started on this zesty adventure!
Ingredients Needed for Mini Tarts
To create these delightful mini lemon tarts, you'll need a selection of basic yet essential ingredients. Each component plays a critical role in contributing to the overall deliciousness of the tarts. Here’s a detailed breakdown of what you’ll need:
- All-purpose flour – the foundation of the tart crust, providing structure and stability. For a gluten-free option, consider using almond flour or a gluten-free flour blend.
- Unsalted butter – brings richness and flavor to the crust; chilled and cubed butter helps create a flaky texture.
- Powdered sugar – for sweetening the crust slightly and ensuring a tender texture.
- Salt – a pinch enhances the sweetness and balances flavors.
- Egg yolk – enriches the dough and aids in binding the ingredients, resulting in a more tender crust.
- Lemon juice – the star ingredient for the filling, offering that coveted zesty tang. Freshly squeezed will yield the best flavor.
- Granulated sugar – adds sweetness to counterbalance the tartness of the lemons.
- Large eggs – essential for creating a silky and stable lemon filling.
- Lemon zest – intensifies the lemon flavor with its fragrant oils, making the filling more aromatic.
- Vanilla extract – adds a hint of warmth and rounds out the flavors.
- Egg whites – needed for fluffy meringue that tops off the tart. Fresh, room-temperature egg whites whip up best.
- Granulated sugar for meringue – essential for stabilizing the meringue and creating stiff peaks.
- Lilac food coloring (optional) – for a touch of whimsy, you can tint your meringue to create visually stunning tarts.
- Fresh mint leaves (optional) – a lovely garnish to add elegance and a hint of herbal freshness.
See the recipe card below for the full list of ingredients and measurements.
Step-by-Step Instructions
Creating mini lemon tart meringues may seem daunting, but with clear steps and a bit of confidence, you can whip up these delightful desserts with ease. Here's how to do it:
- Prepare the Tart Crust: In a mixing bowl, combine the all-purpose flour, powdered sugar, and salt. Cut in the chilled butter using a pastry cutter or your fingers until the mixture resembles coarse crumbs. Stir in the egg yolk and a few tablespoons of cold water until combined, forming a dough.
- Roll out the dough on a lightly floured surface to about a 1/4-inch thickness. Cut circles of dough to fit your mini tart pans. Prick the bases with a fork to prevent bubbling. Place them in the refrigerator to chill for about 30 minutes.
- Bake the Tart Shells: Preheat the oven to 175°C (350°F). Bake the tart shells for 15-20 minutes or until golden brown. Allow them to cool completely on a wire rack before filling.
- Make the Lemon Filling: In a saucepan, whisk together the fresh lemon juice, granulated sugar, eggs, lemon zest, and vanilla extract. Cook over medium heat, stirring constantly until the mixture thickens, about 8-10 minutes. Remove from heat and let it cool slightly before carefully pouring it into the cooled tart shells.
- Prepare the Meringue: In a clean bowl, beat the egg whites using an electric mixer until soft peaks form. Gradually add the granulated sugar, continuing to beat until stiff peaks form and the mixture is glossy. If desired, add a few drops of lilac food coloring and gently fold to combine.
- Assemble the Tarts: Pipe or spoon the lilac meringue onto the lemon filling in each tart. Use a kitchen torch to lightly brown the meringue or place the tarts under a broiler for a few minutes, watching closely to prevent burning.
- Garnish: If desired, garnish the tarts with fresh mint leaves before serving. Enjoy your delightful mini lemon tart meringues!
Tips for Perfect Tart Shells
Especially when it comes to creating the perfect tart shells, a few expert tips can make all the difference:
- Chill Your Dough: Always allow your tart dough to chill before baking. This helps maintain its shape and prevents shrinkage during baking.
- Use Cold Ingredients: Ensure your butter and water are icy cold to create a flakier crust. Warm ingredients can lead to a dense texture.
- Blind Baking: Don’t skip the blind baking step. This instructs you to pre-bake your tart shells to prevent a soggy bottom, ensuring a firm structure for your fillings.
- Watch the Color: When baking, keep an eye on the color of your crust. Overbaking can lead to a bitter taste, while underbaking results in chewiness.
- Use Parchment Paper: When blind baking, consider placing parchment paper with pie weights or dried beans over the crust to prevent it from puffing up.
Looking for more lemony delights? Don't miss out on our Glazed Lemon Brownies, a wonderful twist on traditional desserts.
Variations and Serving Suggestions
The beauty of mini lemon tarts lies in their versatility. Feel free to get creative with these twists:
- Berry Topped: Add fresh raspberries, blueberries, or strawberries on top of the meringue. The combination of citrus and berries is a classic!
- Vegan Friendly: Use coconut cream as a filling instead of egg-based custard and aquafaba whipped into meringue for a delicious vegan option.
- Herbal Infusion: Experiment with unique flavors by incorporating herbs like basil or thyme into your lemon filling for a sophisticated twist.
When it's time to serve, consider pairing these treats with refreshing beverages like iced tea, lemonade, or even sparkling wine to elevate the experience. For another delightful treat, consider making our Lemon Meltaway Cookies alongside your mini lemon tarts.
Nutritional Information
Catering to health-conscious readers, here’s a quick look at the nutritional breakdown for one serving of these mini lemon tarts (traditional version):
- Calories: Approximately 220.5 calories
For those looking for low-calorie modifications, consider using sweeteners like stevia or monk fruit in place of sugar, and coconut cream instead of dairy. Not only does this tweak reduce calories, but it also helps incorporate healthy fats!
Frequently Asked Questions
Readers often have valuable questions when it comes to perfecting their desserts. Here are some common queries about mini lemon tarts:
- Can I make the tart crust ahead of time? Absolutely! You can prepare the tart crust a day in advance. Just store it in an airtight container in the refrigerator until you're ready to fill it.
- What can I use instead of lemon juice? If you need a substitute, you can use lime juice for a similar tart flavor or try using a lemon-flavored extract in a pinch. However, fresh juice gives the best flavor!
- How can I prevent my meringue from weeping? To prevent weeping, ensure that your meringue doesn't come into contact with moisture. Use freshly whipped egg whites and serve the tarts soon after assembling them.
- Is there a vegan option for this recipe? Yes! For a vegan version, you can use coconut cream for the filling and aquafaba (the liquid from canned chickpeas) as a substitute for egg whites in the meringue.
- How should I store leftover tarts? Store leftover tarts in the refrigerator in a covered container. They are best enjoyed within 2-3 days for optimal freshness.
Conclusion: Why You'll Love These Tarts
The joy of baking mini lemon tarts lies not just in the final product but in the delightful journey of creating them. Each mini tart offers a combination of flavors and textures that make for an unforgettable dessert. Not only are they perfect for brightening up dessert tables at gatherings, but they’re also a treat for you and your loved ones.
Don’t hesitate to add your unique twist; whether it’s a different type of citrus or an alternative sweetener, these little tarts are waiting for you to make them your own. So grab those lemons, dive into the world of baking, and let these mini lemon tarts tastefully brighten your day!
For a different take on lemon desserts, try our Lemon Blueberry Buttermilk Cake that brings together the tartness of lemon and sweetness of blueberries.
Ingredients
- 1 cupall-purpose flour
- 1/2 cupunsalted butter (chilled and cubed)
- 1/4 cuppowdered sugar
- 1/4 teaspoonsalt
- 1large egg yolk
- 1/4 cuplemon juice
- 1/2 cupgranulated sugar
- 2large eggs
- 1 teaspoonlemon zest
- 1/2 teaspoonvanilla extract
- 3large egg whites
- 1/2 cupgranulated sugar (for meringue)
- —A few drops lilac food coloring (optional)
Instructions
- 1
In a mixing bowl, combine flour, powdered sugar, and salt. Cut in the chilled butter until the mixture resembles coarse crumbs. Stir in the egg yolk and enough cold water to form a dough. Roll out the dough and cut into circles to fit mini tart pans. Prick the bases with a fork and chill in the refrigerator for 30 minutes.
- 2
Preheat the oven to 175°C (350°F). Bake the tart shells for 15-20 minutes or until golden. Let them cool completely.
- 3
In a saucepan, whisk together lemon juice, sugar, eggs, lemon zest, and vanilla. Cook over medium heat until thickened, stirring constantly. Remove from heat and let cool slightly before pouring into the cooled tart shells.
- 4
In a clean bowl, beat the egg whites until soft peaks form. Gradually add the sugar, continuing to beat until stiff peaks form. If desired, add lilac food coloring and gently fold to combine.
- 5
Pipe or spoon the lilac meringue onto the lemon filling in each tart. Use a kitchen torch to lightly brown the meringue or place the tarts under a broiler for a few minutes, watching closely to prevent burning.
- 6
Garnish the tarts with fresh mint leaves if desired. Serve immediately and enjoy.
Recipe Card
Mini Lemon Tart Meringue: A Zesty Treat for All Occasions
Keep it handy for later, send it to someone cooking with you, or open the clean print view.
- Prep
- 30 min
- Total
- 60 min
- Serves
- 6
You might also like
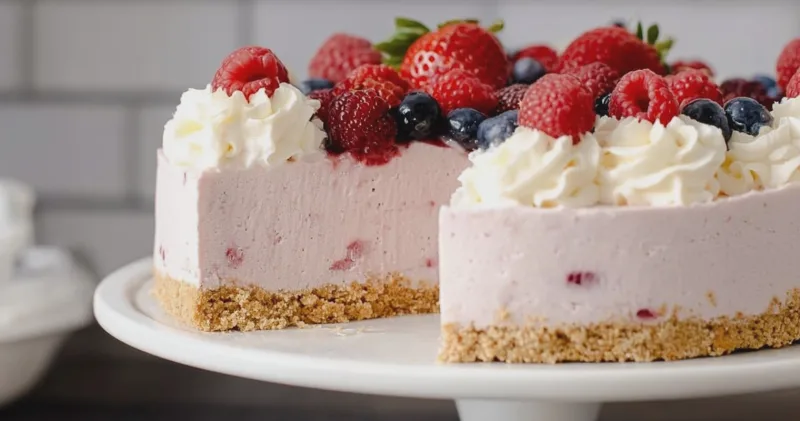
Delicious No Bake Berry Cheesecake Recipe
May 21, 2026
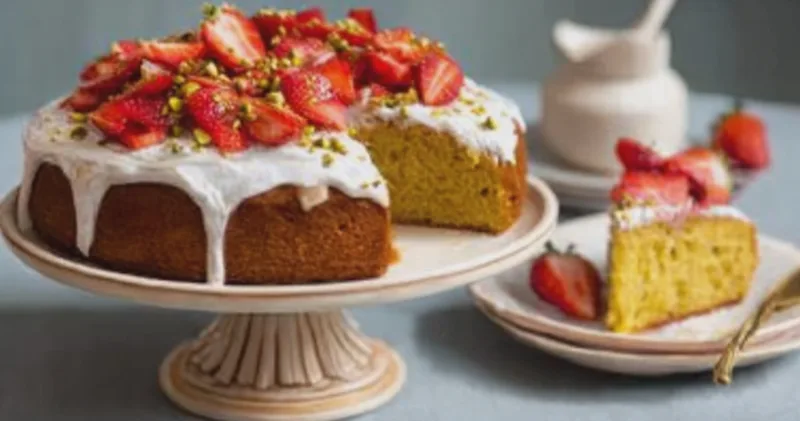
Deliciously Easy Strawberry Pistachio Olive Oil Cake Recipe
May 21, 2026
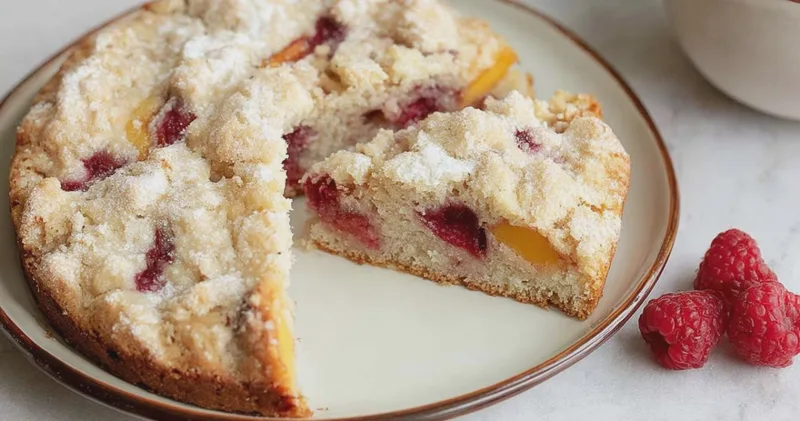
Irresistible Raspberry Peach Cake Recipe
May 21, 2026
The Ultimate Passion Fruit Cake Recipe
May 21, 2026
Reviews
Be the first to review this.