
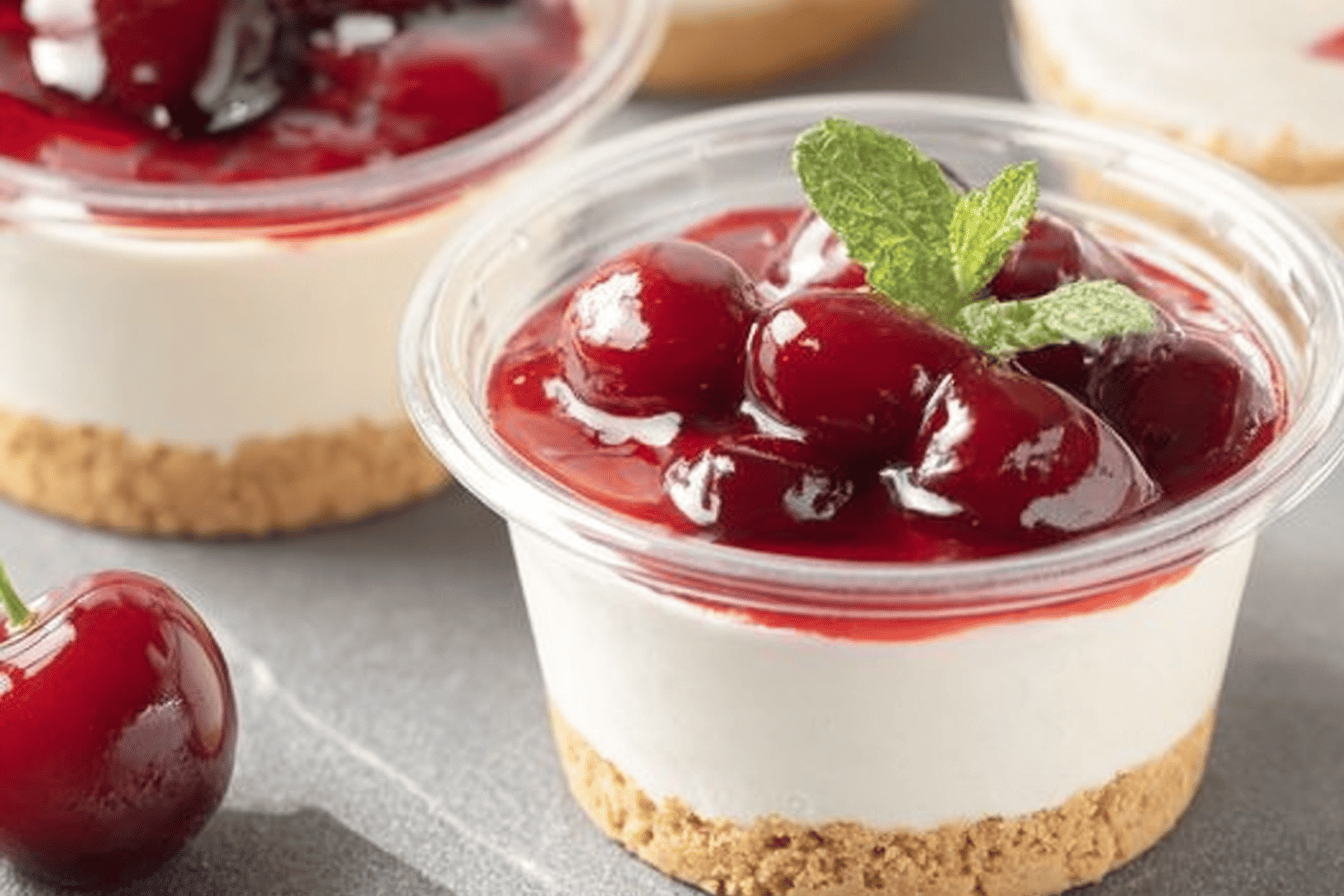
Cheesecake has long been a beloved dessert across various cultures, known for its rich, creamy texture and delightful sweetness. Originating in ancient Greece, this indulgent treat has evolved over time, with countless variations populating dessert menus worldwide. One of the most delightful and convenient forms of cheesecake is the no-bake cheesecake cup. These individual servings are not only visually appealing but also incredibly easy to prepare, making them perfect for any occasion—from birthday parties to holiday gatherings or even a simple family dinner. The beauty of these cheesecake cups lies in their versatility; they can be customized with a variety of toppings and flavor combinations, ensuring that every bite is a delicious experience. 🍰🥳
Tools and Equipment
Before diving into the recipe, it’s essential to gather the necessary tools and equipment. A well-prepared kitchen will make the process smoother and more enjoyable!
- Mixing bowls (preferably one large and one medium)
- Electric mixer or hand whisk
- Spatula
- Piping bag or plastic storage bag (for filling the cups)
- Measuring cups and spoons
- Serving cups or small glass jars
- Freezer (for chilling the mixing bowl)
Ingredients List
Here’s a detailed look at each ingredient that makes these no-bake cheesecake cups a creamy delight:
- 16 oz full fat cream cheese: The base of the cheesecake, providing richness and creaminess.
- 1 ½ cups powdered sugar: This sweetens the cheesecake and gives it a smooth texture. It’s divided into 1 cup and ½ cup for different stages of the recipe.
- 1 Tbsp fresh lemon juice: Adds a refreshing tang that balances the sweetness of the cheesecake.
- 2 cups heavy whipping cream: This is whipped to create a light and airy texture, making the cheesecake fluffier.
- Graham cracker crumbs: Used as a base, adding a crunchy texture that complements the creaminess of the cheesecake.
- 2 tsp vanilla extract: Enhances the overall flavor profile with a sweet aroma.
Preparation Steps
Preparation is key to making these no-bake cheesecake cups successfully. Follow these steps to get started:
- Place a mixing bowl in the freezer for 15 minutes. This helps the cream stay cold, making whipping easier.
- Gather all ingredients and equipment to ensure a smooth workflow.
Step-by-Step Cooking Instructions
Now that you’re prepared, let’s dive into the detailed steps to create these delicious cheesecake cups:
- Beat the cream cheese and 1 cup of powdered sugar in your pre-chilled mixing bowl. Mix until smooth, about 1-2 minutes. Ensure there are no lumps for a creamy texture!
- Remove the mixing bowl from the freezer. Add the heavy whipping cream, ½ cup powdered sugar, lemon juice, and vanilla extract to the bowl. Beat the mixture on high speed until stiff peaks form, about 4-5 minutes. Stiff peaks indicate that the cream is well whipped and will hold its shape.
- Gently fold the whipped cream into the cream cheese mixture using a spatula. Mix on low speed for 1-2 minutes until combined. Be careful not to deflate the whipped cream.
- Prepare your serving cups by placing graham cracker crumbs at the bottom as a crust. You can use as much or as little as you like, depending on your preference for crust thickness.
- Using a piping bag or a plastic storage bag with the corner cut off, pipe the cheesecake mixture into the cups, filling them about ¾ full. This method not only looks professional but also ensures even distribution.
- Refrigerate the cheesecake cups for at least 1-2 hours, or preferably overnight, to allow them to set properly. Chilling helps the flavors meld beautifully.
- Before serving, top with your desired toppings, such as fresh fruit, chocolate shavings, or whipped cream. Enjoy your delicious creation!
Nutritional Information and Health Benefits
These no-bake cheesecake cups are not only a treat for the taste buds but also come with some nutritional benefits. Here’s a breakdown:
- Calcium: The cream cheese and heavy cream provide a good source of calcium, which is essential for strong bones and teeth.
- Protein: The cream cheese and whipping cream contribute to your protein intake, important for muscle repair and growth.
- Customizable: By adding fresh fruits, you can increase the vitamin content and fiber, making the dessert slightly healthier.
While it’s essential to enjoy such desserts in moderation, these cheesecake cups can be part of a balanced diet when made with quality ingredients.
Common Mistakes and Tips to Perfect the Recipe
To ensure your no-bake cheesecake cups turn out perfectly, avoid these common mistakes:
- Using low-fat cream cheese: This can lead to a less creamy texture. Always opt for full-fat for the best results.
- Over-whipping the cream: This can lead to a grainy texture. Stop as soon as stiff peaks form.
- Not chilling the mixing bowl: Skipping this step can result in a less stable whipped cream.
Here are some advanced tips to elevate your cheesecake cups:
- For a flavored cheesecake, consider adding melted chocolate, fruit puree, or even spices like cinnamon to the cream cheese mixture.
- Experiment with different crusts, such as crushed Oreos or shortbread cookies, for a unique twist.
Storage, Serving, and Reheating Tips
Storing and serving these cheesecake cups properly will ensure they maintain their deliciousness:
- Storage: Keep the cheesecake cups in the refrigerator for up to 3 days. They can be covered with plastic wrap to prevent drying out.
- Serving: Serve chilled for the best taste. You can garnish with additional toppings just before serving for a fresh look.
- Reheating: These cheesecake cups are best enjoyed cold and should not be reheated, as this may alter their texture.
For an extra special touch, consider serving them with a drizzle of fruit sauce or chocolate syrup!
FAQs and Recipe Variations
Can I make this recipe gluten-free?
Yes! Use gluten-free cookies or graham crackers for the crust.
How can I add different flavors to the cheesecake?
Consider adding extracts such as almond or peppermint, or incorporate fruit purees to create different flavor profiles.
Can I freeze these cheesecake cups?
While they can be frozen, it’s best to consume them fresh for the best texture and flavor. If freezing, ensure they’re tightly wrapped.
Here are some delightful variations you can try:
- Chocolate No-Bake Cheesecake Cups: Incorporate melted chocolate into the cream cheese mixture.
- Fruit Swirl Cheesecake Cups: Fold in fruit purees for a fruity flavor.
- Nutty Cheesecake Cups: Add crushed nuts to the crust for a delightful crunch.
Conclusion
These no-bake cheesecake cups are a scrumptious way to indulge in a classic dessert without the hassle of baking. With their creamy texture and customizable nature, they are sure to impress at any gathering. Remember, the joy of cooking lies in experimentation, so don’t hesitate to put your unique spin on this recipe! Happy baking, and enjoy your delicious creations!