
Shrimp Pad Thai is a beloved dish that captures the essence of Thai cuisine with its vibrant flavors and textures. This stir-fried noodle dish, which has its roots in Thailand, is a staple in Thai households and restaurants alike. Characterized by its balance of sweet, sour, salty, and spicy flavors, Shrimp Pad Thai is more than just a meal; it’s a celebration of culinary tradition. The combination of fresh ingredients and bold seasonings makes it a favorite for special occasions, family gatherings, or even a cozy weeknight dinner at home. In this article, we will guide you through a simple yet delicious recipe for Shrimp Pad Thai, ensuring that you can recreate this delightful dish in your own kitchen.
Tools and Equipment
To prepare Shrimp Pad Thai, you’ll need some essential tools and equipment to ensure a smooth cooking process. Here’s what you’ll need:
- Large Pan or Wok: A wide pan or wok allows for even cooking and easy tossing of the ingredients.
- Cooking Utensils: A wooden spoon or spatula for stirring and tossing the noodles.
- Measuring Spoons: To measure out your sauces and seasonings accurately.
- Cutting Board and Knife: For preparing your vegetables and shrimp.
- Colander: To drain the rice noodles after boiling.
- Serving Plates: For presenting your finished dish beautifully.
Ingredients List
Here’s what you’ll need to create this delicious Shrimp Pad Thai:
- 8 oz rice noodles
- 1 lb shrimp, peeled and deveined
- 2 tablespoons vegetable oil
- 3 cloves garlic, minced
- 2 eggs, lightly beaten
- 2 cups bean sprouts
- 3 green onions, chopped
- 3 tablespoons fish sauce
- 1 tablespoon sugar
- 1 tablespoon lime juice
- 1 teaspoon crushed red pepper (optional)
- Chopped peanuts for garnish
Each ingredient plays a crucial role in shaping the dish:
Rice noodles: The foundation of Pad Thai, these noodles provide a chewy texture that absorbs the flavors of the sauce.
Shrimp: A key protein in this dish, shrimp adds a sweet and succulent flavor that pairs perfectly with the other ingredients.
Vegetable oil: Essential for frying, it helps achieve that delicious stir-fried taste.
Garlic: Adds aromatic depth and a savory note to the dish.
Eggs: They contribute richness and help bind the ingredients together.
Bean sprouts: These add crunch and freshness, balancing the dish’s textures.
Green onions: They provide a mild onion flavor and a pop of color.
Fish sauce: A staple in Thai cooking, it imparts a salty umami taste.
Sugar: Balances the flavors, enhancing the dish’s sweetness.
Lime juice: Adds a bright, zesty note that elevates the dish.
Crushed red pepper: Optional, but it brings a spicy kick for those who like heat.
Chopped peanuts: Used as a garnish, they add crunch and nuttiness.
Preparation Steps
Before you dive into cooking, there are a few pre-cooking tasks to complete. Follow these steps to prepare your ingredients:
- Soak the rice noodles: Begin by soaking your rice noodles in warm water for about 20-30 minutes until they are pliable but not fully cooked. Drain and set aside.
- Prep the shrimp: Ensure your shrimp is peeled and deveined. This will save you time and make cooking easier.
- Chop the vegetables: Mince the garlic, chop the green onions, and have your bean sprouts ready to go.
- Mix the sauce: In a small bowl, combine the fish sauce, sugar, lime juice, and crushed red pepper (if using). This will be your Pad Thai sauce.
Having these components prepped will make the cooking process much smoother and enjoyable!
Step-by-Step Cooking Instructions
Now that everything is prepped, it’s time to cook! Follow these step-by-step instructions for a perfect Shrimp Pad Thai:
- Heat the oil: In a large pan or wok, heat 2 tablespoons of vegetable oil over medium heat.
- Sauté the garlic: Add the minced garlic to the pan and sauté for about 1 minute until fragrant, but be careful not to let it burn.
- Add the shrimp: Toss in the shrimp and cook until they turn pink and opaque, about 3-4 minutes. Stir occasionally to ensure even cooking.
- Scramble the eggs: Push the shrimp to the side of the pan. Pour the beaten eggs into the cleared space and scramble until they are fully cooked.
- Combine the noodles: Add the soaked rice noodles to the pan along with the bean sprouts and chopped green onions. Toss everything together to mix well.
- Add the sauce: Pour the prepared sauce over the noodle mixture and toss to combine, ensuring all ingredients are evenly coated.
- Heat through: Cook for an additional 2-3 minutes, stirring occasionally, until everything is heated through.
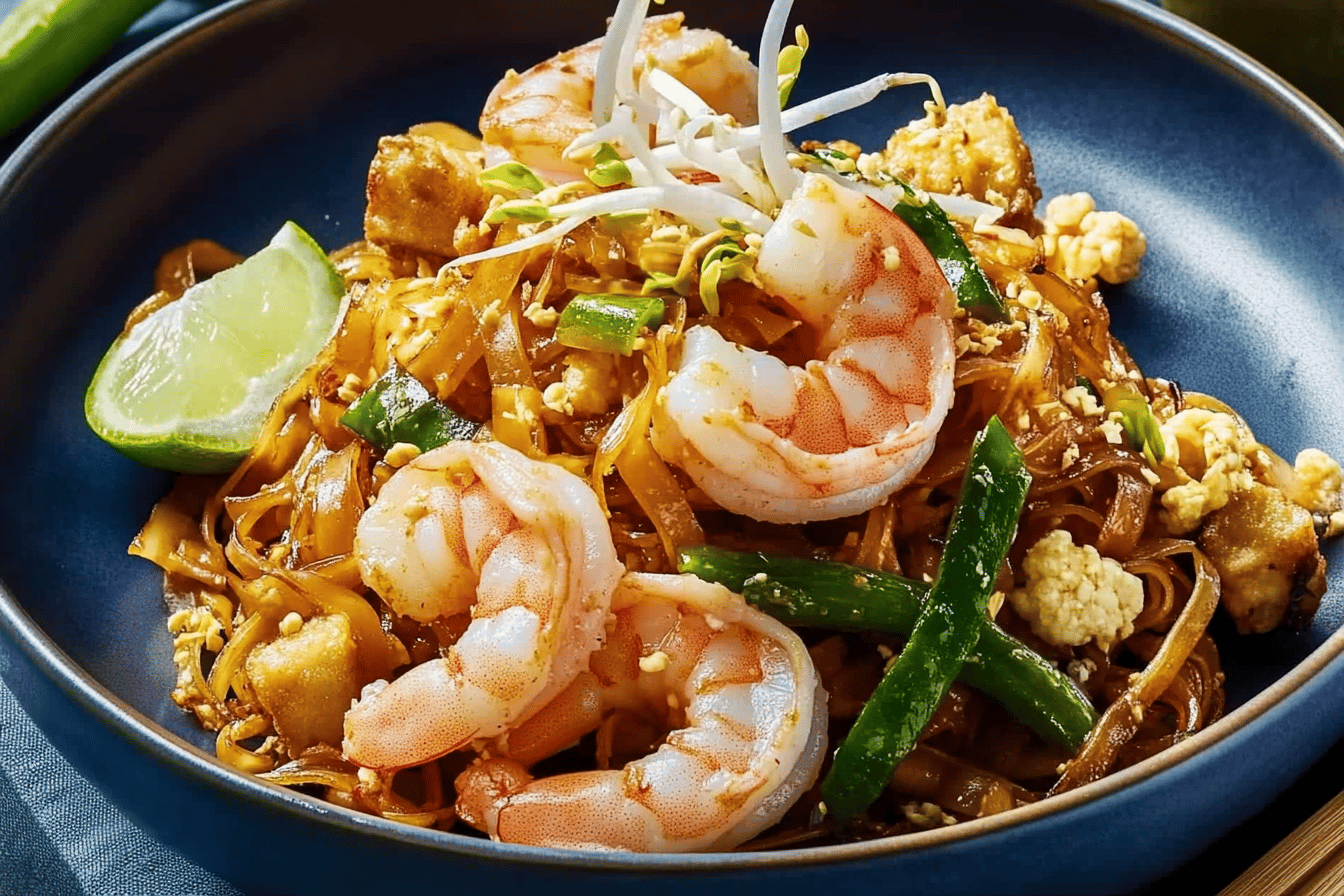
- Serve: Transfer the Shrimp Pad Thai to serving plates and garnish with chopped peanuts. Enjoy your delicious creation!
For an extra touch, consider serving with lime wedges on the side for a zesty boost!
Nutritional Information and Health Benefits
Shrimp Pad Thai is not only delicious but also packed with nutritional benefits. Here’s a look at what makes this dish a wholesome choice:
The shrimp provides a rich source of protein, essential for muscle repair and growth, while the rice noodles offer carbohydrates for energy. Additionally, the dish is loaded with vegetables, such as bean sprouts and green onions, which are high in vitamins and minerals. Fish sauce contributes essential omega-3 fatty acids, promoting heart health. The use of lime juice adds vitamin C, supporting the immune system.
Overall, Shrimp Pad Thai is a balanced meal that combines protein, healthy fats, and carbohydrates, making it a satisfying choice for any time of the day.
Common Mistakes and Tips to Perfect the Recipe
While making Shrimp Pad Thai may seem straightforward, there are some common pitfalls you can avoid:
- Overcooking the shrimp: Ensure that the shrimp are cooked just until pink to avoid a rubbery texture.
- Not soaking the noodles properly: Soak the noodles just until pliable; they will continue to cook in the pan.
- Using too much sauce: Start with less sauce, as you can always add more if needed. Too much can make the dish soggy.
- Burning the garlic: Keep an eye on the garlic while sautéing, as it can quickly go from golden to burnt.
Advanced Tip: For an authentic touch, try adding tamarind paste to the sauce for a distinct tangy flavor that enhances the overall taste of your Pad Thai.
Storage, Serving, and Reheating Tips
If you have leftovers or want to prepare the dish in advance, here are some tips:
- Storage: Store leftover Shrimp Pad Thai in an airtight container in the refrigerator for up to 3 days.
- Reheating: To reheat, use a skillet over low heat with a splash of water to prevent drying out. Stir occasionally until heated through.
- Serving Tips: Serve the Pad Thai hot, with additional lime wedges and crushed peanuts on the side for guests to customize their servings.
Consider pairing your Shrimp Pad Thai with a light salad or spring rolls for a complete meal!
FAQs and Recipe Variations
Can I use chicken or tofu instead of shrimp? Yes, you can substitute shrimp with chicken, tofu, or even a combination of both for a different protein option.
What if I can’t find fish sauce? You can use soy sauce or a vegan fish sauce alternative, but it will slightly alter the flavor profile.
Can I make Pad Thai gluten-free? Absolutely! Just use gluten-free rice noodles and ensure your fish sauce is gluten-free.
Here are some delicious variations to try:
- Vegetable Pad Thai: Omit the shrimp and add more vegetables like bell peppers, carrots, and zucchini.
- Spicy Pad Thai: Increase the amount of crushed red pepper or add fresh chili for a heat boost.
- Peanut Butter Pad Thai: Add a tablespoon of peanut butter to the sauce for a creamy twist.
Conclusion
Shrimp Pad Thai is truly a culinary gem that brings the vibrant flavors of Thai cuisine to your table. Its balance of textures and the delightful combination of ingredients create a dish that is both satisfying and nourishing. Whether you’re cooking for a special occasion or simply craving something delicious, this recipe is sure to impress. So gather your ingredients, follow the steps, and enjoy the journey of creating this iconic dish!